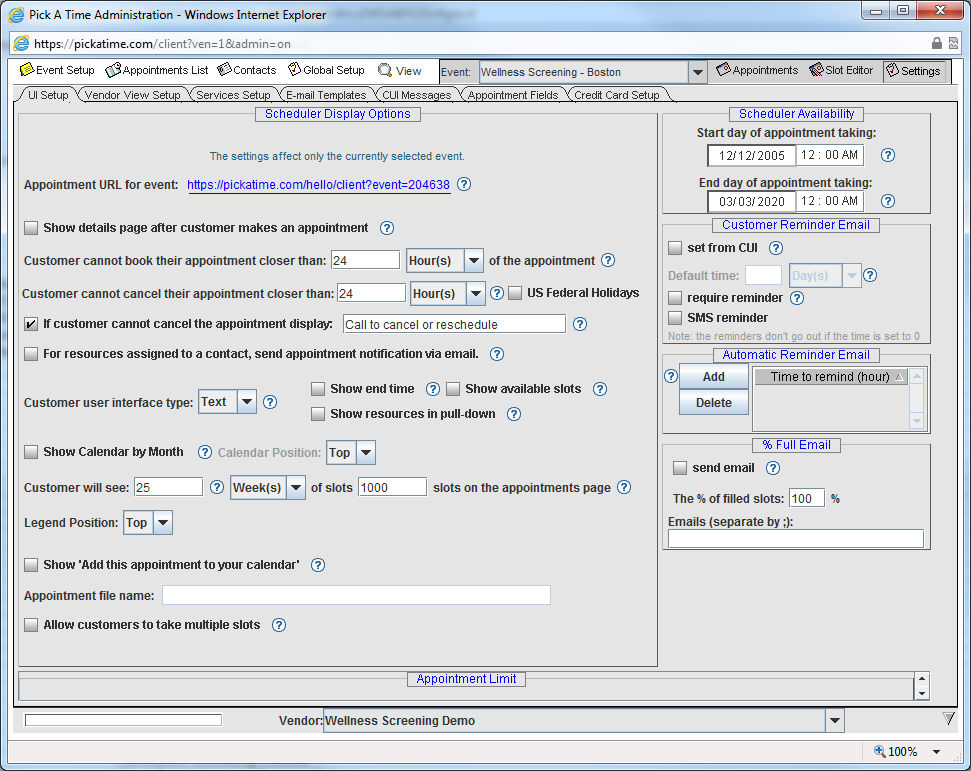
From the Admin UI, select the Settings tab
Select the UI Setup tab
To turn on the online scheduler so customers can use the website and schedule appointments, modify the “Start day of appointment taking” and the “End day of appointment taking.”
IMPORTANT NOTE: To test out the site as if you were a customer you will need to have your testing dates fall within the start date and end date of appointment taking.
At the top of the UI Setup page you will see the URL for the selected event. Each event on an account has a unique event number which can be included in the URL to take the parent directly to that event.
If you only have one event on your account, then you should use the URL for the entire account. This URL is found on the Global Setup / Business Setup page and is listed under the Appointment URL for customer.
Once you have opened up the site you should try it out as if you were a customer.